
Scanning
Begin Zenmap by typing zenmap in a terminal or by clicking the Zenmap icon in the desktop environment. The main window, as shown in Figure 12.2, is displayed.
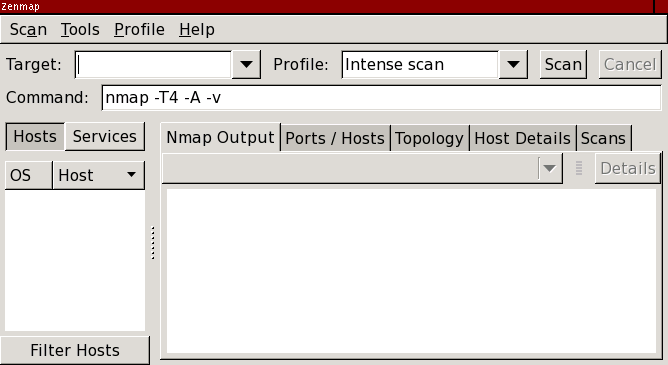
One of Zenmap's goals is to make security scanning easy for beginners and for experts. Running a scan is as simple as typing the target in the “Target” field, selecting the “Intense scan” profile, and clicking the “Scan” button. This is shown in Figure 12.3.

While a scan is running (and after it completes), the output of the Nmap command is shown on the screen.
Any number of targets, separated by spaces, may be entered in the
target field. All the target specifications supported by Nmap are also
supported by Zenmap, so targets such as 192.168.0.0/24
and 10.0.0-5.* work. Zenmap remembers the targets scanned most
recently. To re-scan a host, select the host from the
combo box attached to the “Target” text field.
Profiles
The “Intense scan” is just one of several scan profiles that come with Zenmap. Choose a profile by selecting it from the “Profile” combo box. Profiles exist for several common scans. After selecting a profile the Nmap command line associated with it is displayed on the screen. Of course, it is possible to edit these profiles or create new ones. This is covered in the section called “The Profile Editor”.
It is also possible to type in an Nmap command and have it executed without using a profile. Just type in the command and press return or click “Scan”. When you do this the “Profile” entry becomes blank to indicate that the scan is not using any profile—it comes directly from the command field.
Scan Aggregation
Zenmap has the ability to combine the results of many Nmap scans into one view, a feature known as scan aggregation. When one scan is finished, you may start another in the same window. When the second scan is finished, its results are merged with those from the first. The collection of scans that make up an aggregated view is called a network inventory.
An example of aggregation will make the concept clearer. Let's run a quick scan against scanme.nmap.org.

Now do the same against localhost:
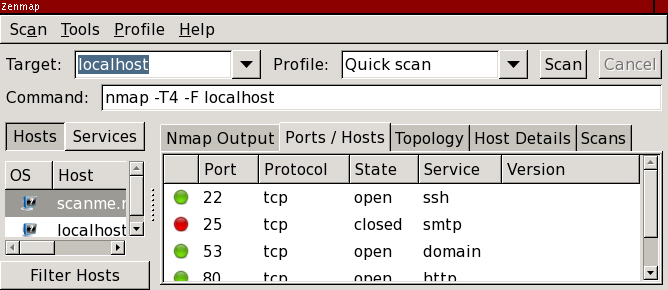
Now results for both scanme and localhost are shown. This is something you could have done with one Nmap scan, giving both targets, although it's convenient not to have to think of all the targets in advance. Now suppose we want some more information about scanme, so we launch an intense scan on it.
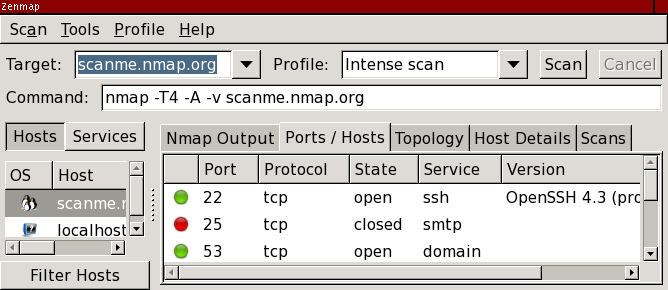
Now scanme has a little penguin icon showing that its operating system has been detected as Linux. Additionally one of its services has been identified. Now we're doing something you can't do with a single Nmap scan, because you can't single out a host for more intense scanning like we did. The results for localhost are still present, though we won't know more about it than we did before unless we decide to do a more in-depth scan.
It is not necessary to wait for one scan to finish before starting another. Several scans may run concurrently. As each one finishes its results are added to the inventory. Any number of scans may make up an inventory; the collection of scans is managed in the “Scans” scan results tab, as fully described in the section called “The “Scans” tab”.
It is possible to have more than one inventory open at the same time. Zenmap uses the convention that one window represents one network inventory. To start a new inventory, select “New Window” from the “Scan” menu or use the ctrl+N keyboard shortcut. Starting a scan with the “Scan” button will append the scan to the inventory in the current window. To put it in a different inventory open up a separate window and run the scan from there. Loading scan results from a file or directory will start a new inventory, unless you use the “Open Scan in This Window” menu item. For more on saving and loading network inventories and individual scans see the section called “Saving and Loading Scan Results”.
To close a window choose “Close Window” from the “Scan” menu or press ctrl+W. When all open windows are closed the application will terminate. To close all open windows select “Quit” or press ctrl+Q.