
Zenmap in Your Language
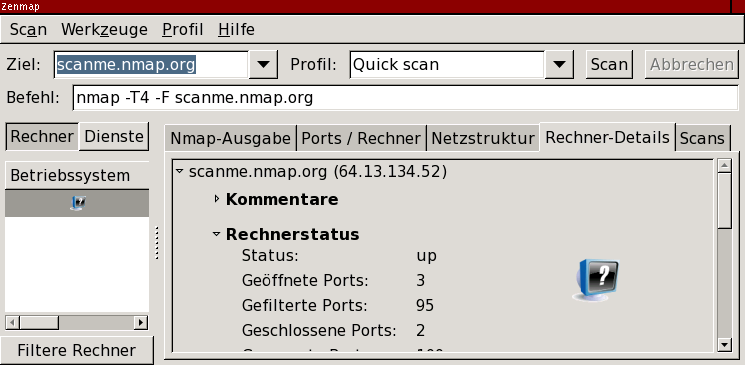
Zenmap has been translated into a few languages other than English. Figure 12.18 shows what Zenmap looks like in German. This section shows how to use Zenmap's translations.
On Unix-like systems, you select your preferred language by setting
the LANG environment variable. Even on other operating
systems with different language selection facilities, setting
LANG is the most foolproof way to get translations when
other methods don't work. Your Unix-like operating system may set
LANG as a side effect of its language configuration. If
it does not, add a line like the following to your
.login
or
.profile,
replacing de with your locale name:
export LANG=de
A locale name is a language code optionally followed by a country code
and sometimes other information. Language codes are from
ISO 639
and country codes are from
ISO 3166.
Here “de” means German; another example is
“pt_BR” for Brazilian Portuguese. To disable localization
entirely and use the default English text, set LANG=C.
To set LANG on Windows XP, follow these steps. Open the
Control Panel and choose the “System” item. Click
the “Advanced” tab and then the
“Environment Variables” button. A new display
will open up; under “User variables” click
“New”. In the form that appears enter
“LANG” for the variable name and your locale name for the
value. The process is illustrated in
Figure 12.19.
LANG environment variable on Windows XP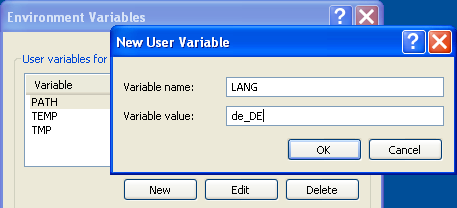
On Mac OS X, setting LANG in a shell startup file as
described above has an effect only when Zenmap is started from a
terminal. The graphical Finder interface keeps its environment
variables in a separate file,
.MacOSX/environment.plist.
To create it, open the TextEdit application and enter the following,
replacing de with your locale name:
{ LANG=de; }
Then from the “Format” menu choose
“Make Plain Text”. Open the
“Save” dialog, select your home directory and
click “New Folder”. Create a folder called
.MacOSX and click past the warning that appears.
Save the file with the name environment.plist,
and insist on the extension .plist in the next
warning that appears. Finally, log out and back in to make the change
take effect. A portion of this process is shown in
Figure 12.20.
LANG environment variable on Mac OS X
Creating a new translation
Creating a new translation for Zenmap, or updating an existing one,
is not hard technically, though of course it requires some know-how
and knowledge of at least one language other than English. Zenmap's
translations are handled by the GNU
gettext system,
which is documented fully at
http://www.gnu.org/software/gettext/manual/. This
section is a summary of the manual translation process. There also
exist specialized translation editing programs that do these steps
automatically.
Let's say you are going to make a translation into Spanish, which
has the language code “es”. Within the Zenmap source
tree there is a plain-text file share/zenmap/locale/zenmap.pot
containing all the translatable strings in the application. You
create a new portable object
(.po) file by running
msginit -l es.po -i zenmap.pot. The new
es.po file contains all the application's
English strings followed by blank strings where you fill in the
appropriate translations.
To test the portable object file you must turn it into a
machine object (.mo)
file. Create the directory es/LC_MESSAGES and
then run msgfmt es.po -o es/LC_MESSAGES/zenmap.mo.
With this file in place Zenmap will use your translation when
LANG is set properly. To update the portable object
file when zenmap.pot changes, run
msgmerge -U es.po zenmap.pot. This will add new
strings and mark any obsolete strings so they can be removed.
When you start a new translation, announce your intention to the
nmap-dev
mailing list. The mailing list is also a good place to get
translation advice. Then when you are finished, send in the
.po file.